Preparing for a character design portfolio can feel overwhelming, especially when you’re trying to showcase your creativity and technical skills all at once.

But don’t worry—there are proven strategies that can help you stand out and bring your unique ideas to life. From mastering anatomy basics to exploring different styles, the key is balancing practice with thoughtful experimentation.
I’ve tried various approaches myself, and some tips made a huge difference in how my designs evolved. Ready to level up your character design game? Let’s dive into the details and make sure you’re fully prepared!
Building a Strong Foundation in Anatomy
Understanding Basic Human Proportions
When you first start designing characters, grasping the fundamentals of human anatomy can feel like a chore, but it’s absolutely essential. I remember when I ignored this step and my characters ended up looking awkward or stiff.
Learning about head-to-body ratios, limb lengths, and joint placements gives your designs a natural flow and believability. Even if you plan to stylize heavily later on, having that solid reference point ensures your exaggerations feel intentional rather than accidental.
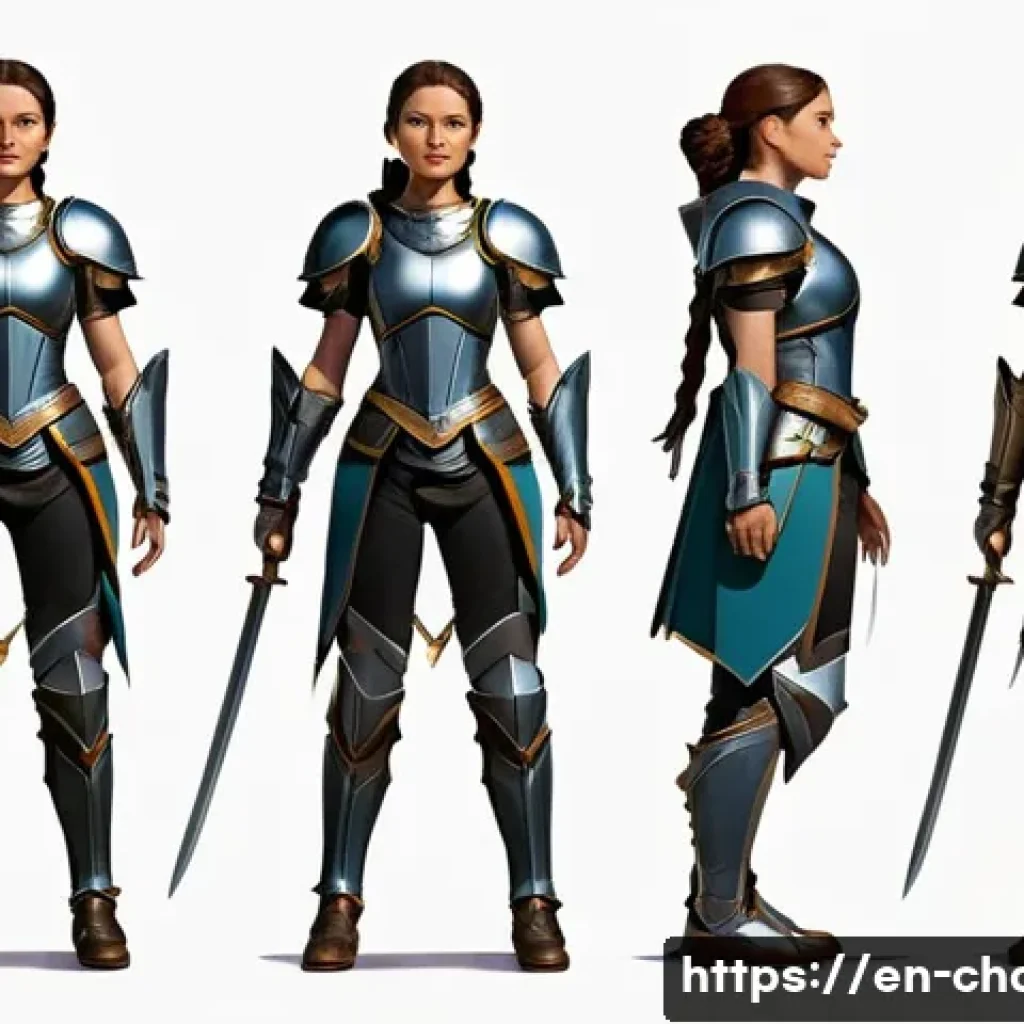
Try breaking down complex poses into simple shapes and stick to the classic “eight heads tall” rule as a starting point. This practice helps you maintain consistency across different characters and angles.
Mastering Gesture Drawing for Dynamic Poses
Gesture drawing is a game changer for capturing movement and life in your characters. Instead of focusing on details right away, I’ve found that spending time on quick, loose sketches—sometimes just 30 seconds each—helps me understand the energy and flow of a pose.
It’s like catching the essence of a character’s mood or action in a heartbeat. When you do this regularly, your designs become more fluid and expressive.
Plus, it’s a great warm-up exercise before diving into detailed work. Incorporating this habit improved my portfolio pieces dramatically, making them pop off the page.
Using References Without Losing Your Voice
Nobody designs characters in a vacuum, and using references is not cheating—it’s smart. What took me a while to realize is that the key isn’t copying but learning.
Gather images, photos, or even real-life observations and analyze what makes the anatomy or posture work. Then, remix those elements with your own style.
For instance, I once studied dancers to understand balance and grace, then applied those observations to a fantasy warrior character. The end result was a design that felt both realistic and original.
Keep a reference library handy and don’t be afraid to revisit it as you refine your skills.
Exploring and Refining Your Unique Style
Experimenting with Different Art Styles
One of the most exciting parts of character design is finding your own artistic voice. Early on, I tried mimicking popular styles like anime, western cartoons, and realistic portraits to see what clicked with me.
This experimentation phase is crucial; it broadens your toolkit and helps you discover what feels natural and enjoyable. Don’t rush to settle on one style too soon—sometimes blending elements from multiple influences creates a fresh, captivating look.
For example, mixing bold comic book line work with soft shading techniques can add depth and personality to your characters.
Balancing Creativity with Clarity
While it’s tempting to pile on details and intricate designs, remember that clarity is king in character design. When I overloaded my early designs with too many accessories or complicated costumes, viewers often missed the core personality I wanted to convey.
Simplifying shapes and focusing on a few key traits makes your characters more memorable and easier to animate or model later on. Think of iconic characters like Mario or Pikachu—they’re instantly recognizable because of their clean, distinct silhouettes.
Strive for that balance between creative flair and straightforward readability.
Iterating Based on Feedback and Self-Critique
No design is perfect on the first try. I always set aside time to revisit my characters after a few days with fresh eyes or share them with trusted peers for feedback.
Sometimes what feels brilliant in the moment doesn’t hold up under scrutiny. Constructive criticism helped me identify weak points like awkward poses or confusing color schemes that I might have missed.
Also, don’t be afraid to scrap ideas that aren’t working. Iteration is where growth happens, so embrace it as a necessary and rewarding part of the process.
Crafting a Cohesive Portfolio Presentation
Organizing Your Work for Maximum Impact
When it comes to putting together your portfolio, how you present your designs can be just as important as the designs themselves. Early in my journey, I made the mistake of just dumping all my sketches and final pieces in random order, which confused viewers and diluted the overall impression.
Instead, try grouping your work by theme, style, or project. Start with your strongest piece to grab attention, then take the viewer on a visual journey that showcases your range and growth.
Consistency in layout, font choices, and image quality also contributes to a professional feel.
Highlighting Process and Thought Behind Designs
Showing your final characters is great, but including process shots or concept iterations can elevate your portfolio significantly. I like to add sketches, color studies, and notes explaining my choices—this transparency demonstrates your problem-solving skills and dedication.
Clients and employers appreciate seeing how you approach challenges and refine your ideas. For example, including a side-by-side of a rough sketch and polished final design reveals your ability to develop concepts thoughtfully rather than just relying on talent alone.
Balancing Quantity with Quality
It’s tempting to showcase every character you’ve ever drawn, but quality always beats quantity. I learned this the hard way when my portfolio felt bloated and overwhelming.
Aim to include 8 to 12 of your best, most diverse pieces that truly represent your skills and style. It’s better to have a lean, focused portfolio than a sprawling collection of inconsistent work.
This approach keeps viewers engaged and leaves a stronger impression. Remember, sometimes less is more, especially when each piece tells a unique story about your abilities.
Leveraging Digital Tools for Efficiency
Choosing the Right Software for Your Workflow
The digital art landscape can be overwhelming with options like Photoshop, Procreate, Clip Studio Paint, and others. I experimented with several before settling on what felt intuitive and supportive for my process.
The right software speeds up your work and allows you to experiment without fear—undo, layers, and brushes tailored to character design are huge time-savers.
Don’t hesitate to watch tutorials or read forums to master your chosen tool’s shortcuts and features; this investment pays off with smoother, faster creation.
Utilizing Custom Brushes and Textures
Adding personality to your characters often comes down to subtle details like brush texture or shading style. I created and downloaded custom brushes that mimic traditional media such as pencils, inks, or paints to add richness to my digital work.
These brushes gave my characters a tactile feel that plain digital tools couldn’t replicate. Experimenting with different brushes also keeps the process fun and fresh, preventing creative blocks.

Incorporate textured brushes for hair, fabric, or skin to add depth and realism without overworking your piece.
Streamlining Your Workflow with Templates and Shortcuts
Efficiency matters, especially when juggling multiple projects or deadlines. I built templates for character turnaround sheets, color palettes, and pose thumbnails that I reuse regularly.
This consistency not only saves time but also creates a polished, professional look. Keyboard shortcuts and custom hotkeys are another game changer—I mapped my most-used commands to keys I can reach quickly, cutting down on mouse clicks and interruptions.
Over time, these small hacks compound, giving you more time to focus on creativity.
Understanding Color Theory and Its Impact
Choosing a Harmonious Color Palette
Color can make or break your character’s appeal. Early on, I found myself overwhelmed by the vast spectrum and ended up with palettes that clashed or felt dull.
Learning basic color theory—complementary, analogous, triadic schemes—helped me create combinations that enhance mood and personality. For example, warm colors like reds and oranges evoke energy and passion, while cool blues and greens can suggest calm or mystery.
Try limiting your palette to three or four main colors to maintain harmony and avoid visual chaos.
Using Color to Convey Emotion and Story
Beyond aesthetics, color tells a story. When designing a villain, I lean towards darker, muted tones with sharp contrasts to evoke unease. For heroes, brighter, saturated colors often work better to inspire trust and likability.
I once designed a character who was both regal and mysterious by mixing royal purples with shadowy greys, and the palette immediately communicated that duality.
Think about the psychological impact of your color choices and how they support your character’s narrative.
Testing Color Variations and Lighting
Don’t settle on your first color choice. I like to create several color studies of the same character under different lighting or mood conditions to see what works best.
Sometimes a palette that looks perfect in flat light loses its charm when shadows or highlights come into play. Experiment with warm vs. cool lighting or day vs.
night scenes to discover new dimensions in your design. This exploration not only enriches the final piece but also prepares you to adapt your character across various media or settings.
Preparing for Presentation and Critique
Creating Clean, High-Quality Renders
When it’s time to finalize your portfolio, presenting clean, polished renders is crucial. I make sure my digital files are high resolution and properly cropped, avoiding distracting backgrounds or clutter.
A simple neutral or gradient backdrop helps your character stand out without competing for attention. Use consistent lighting and shadowing techniques to unify your pieces visually.
Presenting your work professionally signals to viewers that you take your craft seriously and respect their time.
Practicing Your Pitch and Storytelling
If you’re preparing for an interview or portfolio review, being able to talk about your designs confidently makes a huge difference. I rehearse explaining my design choices, inspirations, and challenges to friends or mentors.
This practice helps me articulate the thought process behind my characters and respond to questions smoothly. Storytelling breathes life into your portfolio, turning static images into engaging narratives that stick with your audience.
Embracing Feedback as a Growth Tool
Critiques can sting, but they’re invaluable. I learned to separate my ego from my work and see feedback as a chance to improve rather than a personal attack.
When reviewers point out areas for improvement, I take notes, ask clarifying questions, and reflect on their perspective before making changes. This mindset shift accelerated my development far more than working in isolation.
Remember, every artist evolves through honest, constructive criticism.
| Preparation Area | Key Tips | Personal Experience Insight |
|---|---|---|
| Anatomy | Master proportions, practice gesture drawing, use references wisely | Gesture drawing added dynamism to my poses, making characters feel alive |
| Style Exploration | Try multiple styles, simplify designs, iterate based on feedback | Blending comic and realistic styles helped create unique, memorable characters |
| Portfolio Presentation | Organize work thoughtfully, include process shots, focus on quality | Process reveals impressed clients and showed my problem-solving skills |
| Digital Tools | Choose intuitive software, use custom brushes, create templates | Custom brushes added texture and personality to digital art |
| Color Theory | Use harmonious palettes, convey emotion, test lighting variations | Color choices transformed character mood and narrative impact |
| Presentation & Critique | Deliver polished renders, practice storytelling, embrace feedback | Feedback sessions revealed blind spots and boosted my growth |
Conclusion
Building strong character designs takes time, patience, and a willingness to learn from both successes and mistakes. By mastering anatomy, exploring your style, and presenting your work thoughtfully, you’ll create characters that truly resonate. Remember, growth comes from practice and embracing feedback, so keep refining your craft with passion and confidence.
Useful Tips to Keep in Mind
1. Always start with solid anatomy fundamentals to give your characters believable proportions and movement.
2. Experiment with different art styles to find what feels authentic and enjoyable for you.
3. Organize your portfolio clearly, highlighting your process as well as final pieces to show your development.
4. Use digital tools like custom brushes and templates to speed up your workflow and add unique textures.
5. Apply color theory thoughtfully to evoke emotion and support your character’s story effectively.
Key Takeaways
Focus on learning the basics of anatomy and gesture to bring life to your designs. Balance creativity with clarity to make your characters memorable and easy to understand. Present your portfolio professionally by organizing your best work and showcasing your creative process. Leverage digital tools and color theory to enhance your art’s quality and emotional impact. Lastly, embrace critique as an essential part of your artistic growth and keep iterating to refine your skills continuously.
Frequently Asked Questions (FAQ) 📖
Q: What are the essential elements to include in a character design portfolio to impress potential employers or clients?
A: When building your character design portfolio, focus on showcasing a variety of skills that highlight both creativity and technical proficiency. Include character turnarounds, expressions, and dynamic poses to demonstrate your understanding of anatomy and movement.
It’s also beneficial to show your process—like initial sketches or concept iterations—because it reveals your problem-solving approach. Make sure each piece tells a story or conveys personality; this helps your characters feel alive and memorable.
From my experience, quality over quantity matters, so curate your strongest work rather than overwhelming viewers with too many designs.
Q: How can I improve my character design skills if I feel stuck or uninspired?
A: Feeling stuck is totally normal, and the best way out is to mix structured practice with playful experimentation. Start by revisiting anatomy fundamentals; even simple gesture drawings can reignite your understanding of form and movement.
Then, challenge yourself to explore styles outside your comfort zone—try exaggeration, caricature, or even styles from different cultures or time periods.
Personally, I found that setting small daily goals, like designing a character based on random prompts, helped break creative blocks. Also, seek feedback from peers or online communities; fresh perspectives often spark new ideas you hadn’t considered.
Q: Should I focus on mastering one art style or diversify my styles in my portfolio?
A: It depends on your career goals, but generally, having a strong, recognizable style is valuable because it shows your unique voice as an artist. However, versatility is equally important, especially if you want to work in different industries like gaming, animation, or comics.
I recommend including a core style that you excel at, alongside a few varied examples that demonstrate your adaptability. This balance can make your portfolio stand out because it shows you’re not only skilled but also flexible enough to meet diverse project needs.
In my journey, clients appreciated seeing that I could tailor designs to different moods and audiences without losing quality.