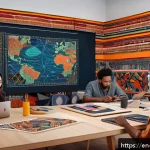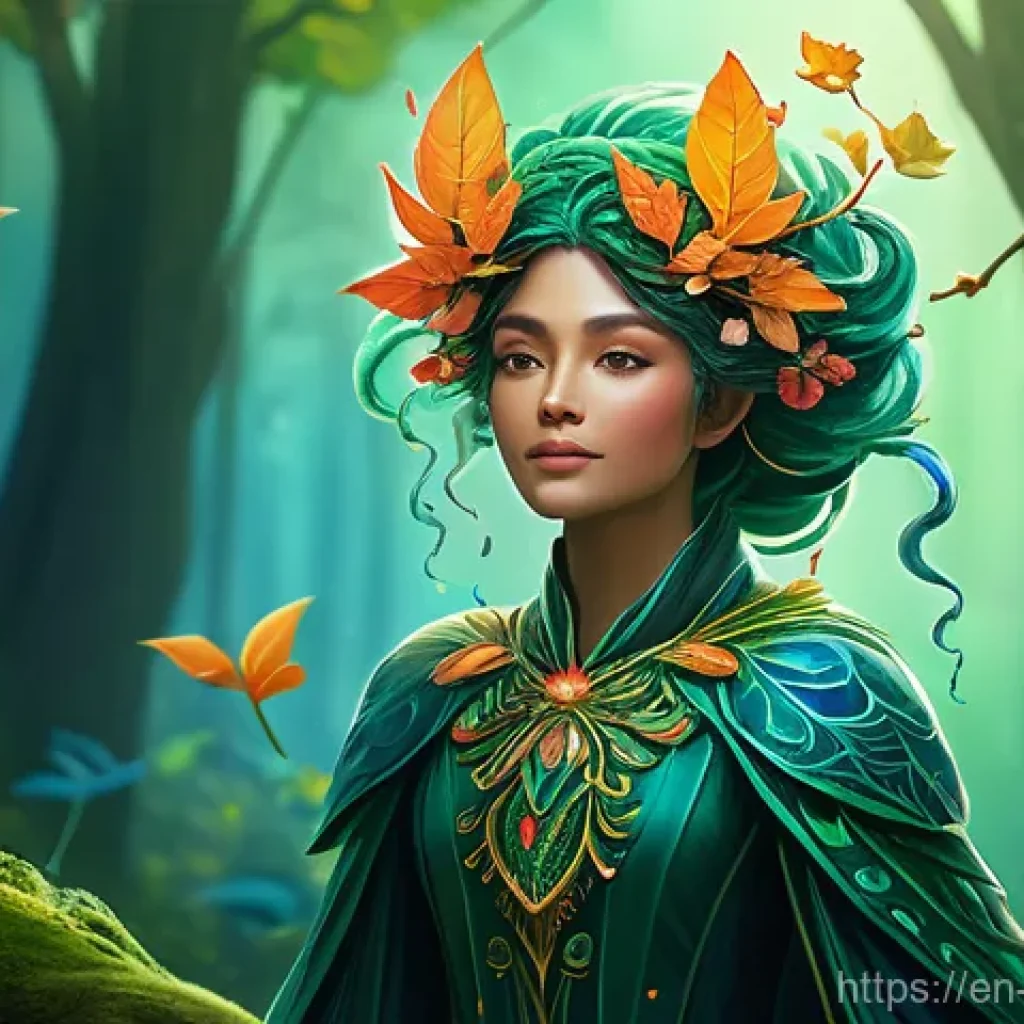
Hey there, fellow creators! Have you ever found yourself staring at a blank canvas, brimming with character ideas, only to feel a little lost when it comes to picking the right digital tools to bring them to life?
Trust me, I’ve been there countless times. The digital art landscape is evolving at warp speed, and keeping up can feel like a marathon! What worked wonders just a couple of years ago might already have a more efficient, powerful counterpart today.
From the intuitive brush strokes of Procreate to the robust layering of Photoshop, and even diving into the intricate sculpting worlds of ZBrush or the versatile open-source magic of Blender – the options are truly endless.
And let’s not even get started on the exciting, sometimes bewildering, ways AI is starting to shake up concept generation. As someone who’s spent countless hours immersed in sketching, painting, and refining characters for various projects, I’ve personally experimented with a dizzying array of software and hardware.
I’ve seen firsthand how crucial it is to not just *have* the tools, but to genuinely understand how to wield them effectively to transform your wildest imaginings into tangible, captivating characters.
It’s about optimizing your workflow, boosting your creativity, and ultimately, making your artistic journey smoother and more rewarding. Let’s unravel the complexities and uncover the digital secrets that will elevate your character designs to the next level!
Finding Your Digital Canvas: Matching Tools to Your Vision

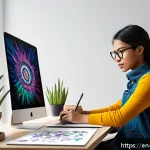
Okay, so you’ve got this amazing character brewing in your mind, right? Maybe they’re a futuristic warrior, a whimsical forest sprite, or a gritty detective from a bygone era. The first hurdle, and often the most exciting one, is figuring out which digital tools will truly bring them to life in the way you envision. I’ve personally dabbled with so many different setups over the years, from sketching on a tiny Wacom Intuos to painting on a hefty Cintiq, and now I mostly gravitate towards my iPad Pro for its incredible portability and responsiveness. It’s not just about what’s popular; it’s about what feels right in your hand and aligns with your creative flow. Some artists thrive on the boundless customization of Photoshop, meticulously crafting every pixel, while others prefer the intuitive, almost sketchbook-like feel of Procreate. I remember one project where I tried to force myself to use a particular software because everyone else was raving about it, only to find myself battling the interface more than creating. Trust me, that’s a surefire way to kill your creative mojo! Experimentation is key here; don’t be afraid to try trial versions or even free alternatives like Krita or GIMP. The goal is to find that sweet spot where the technology fades into the background, and all that’s left is you and your art. Think about whether your style leans more towards painterly textures, crisp line art, or even highly detailed 3D models. Your choice of software profoundly impacts your journey from initial spark to final render, and finding that perfect match early on can save you so much frustration down the line.
The Tablet Tangle: Wacom vs. iPad Pro
When it comes to the digital drawing surface, this is a debate I’ve found myself in countless times with fellow artists. For years, Wacom reigned supreme, and honestly, for good reason. Their Intuos and Cintiq lines offer unparalleled pressure sensitivity and build quality. I’ve still got an old Intuos Pro that’s a workhorse, and my Cintiq 22HD, though heavy, is brilliant for long sessions at my desk. But then the iPad Pro burst onto the scene with the Apple Pencil, and it was a total game-changer for me. The ability to just grab my iPad, plop down on the couch, and sketch with virtually no lag, all while running a full-featured app like Procreate, felt like magic. It’s incredibly liberating to not be tethered to a desktop. However, it’s not a one-size-fits-all solution. If you’re a professional illustrator who needs precise color calibration across multiple monitors and the sheer power of a desktop workstation for massive files, a Cintiq or a high-end Wacom tablet connected to a powerful PC might still be your best bet. The iPad Pro excels in portability and intuitive touch gestures, making it fantastic for concepting and general illustration, but it does have limitations regarding RAM and certain desktop-exclusive software features. My advice? Consider your primary workspace and your workflow. If you’re often on the go or prefer a more direct, screen-to-stylus experience for lighter tasks, the iPad Pro is stellar. If heavy-duty production work and maximum software compatibility are your priorities, a Wacom setup still holds its own.
2D Powerhouses: Procreate, Clip Studio Paint, and Photoshop Compared
Navigating the sea of 2D art software can feel overwhelming, especially with so many fantastic options available today. I’ve spent countless hours in each of these, and they all bring something unique to the table. Photoshop, the granddaddy of them all, is an absolute beast. Its layering capabilities, blending modes, and extensive array of tools make it the industry standard for a reason. I’ve used it for everything from intricate character painting to graphic design elements, and its sheer versatility is unmatched. The learning curve can be steep, though, and it requires a subscription, which isn’t for everyone. Then there’s Procreate, my current daily driver on the iPad. It’s incredibly intuitive, feels like drawing on real paper, and its brush engine is simply sublime. For quick concepts, vibrant illustrations, and general digital painting, it’s hard to beat. The only real limitation is that it’s iPad-exclusive, which means you’re tied to that ecosystem. Finally, Clip Studio Paint – oh, how I adore Clip Studio Paint for character work! It truly shines when it comes to line art, comics, and animation. Its vector lines are a dream for clean linework, and features like perspective rulers and 3D model import for posing characters are absolute lifesavers. It offers a fantastic balance of powerful features and a more streamlined interface compared to Photoshop, and it’s a one-time purchase on most platforms. My personal workflow often involves concepting in Procreate, refining line art and coloring in Clip Studio Paint, and then doing final touch-ups or complex manipulations in Photoshop. Each has its strengths, and the best tool is often the one that helps you achieve your vision most efficiently.
| Tool Category | Recommended Software/Hardware | Key Benefits for Character Design |
|---|---|---|
| 2D Digital Painting & Illustration | Procreate, Clip Studio Paint, Adobe Photoshop | Intuitive brush engines, robust layering, precise line art, extensive color tools. |
| 3D Sculpting & Modeling | ZBrush, Blender, Autodesk Maya | Organic sculpting, detailed topology, dynamic posing, realistic rendering. |
| Vector Graphics | Adobe Illustrator, Affinity Designer | Scalable artwork, clean lines, ideal for logos, flat designs, and graphic elements. |
| Graphics Tablets (Screen) | Wacom Cintiq, iPad Pro (with Apple Pencil) | Direct drawing experience, high pressure sensitivity, natural feel. |
| Graphics Tablets (Pen) | Wacom Intuos, Huion Inspiroy | Cost-effective, excellent pressure sensitivity, good for desk-bound artists. |
Mastering the Fundamentals: From Sketch to Refined Line Art
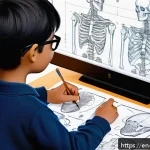
Once you’ve settled on your go-to tools, it’s all about getting down to brass tacks and really digging into the fundamentals of digital creation. I often tell aspiring artists that digital tools don’t make you a better artist; they simply make your existing skills more efficient. What truly matters is understanding form, anatomy, perspective, and composition. The magic happens when you combine that foundational knowledge with the incredible capabilities of software like Clip Studio Paint or Photoshop. I remember struggling for ages with inconsistent line weight in my digital sketches, making my characters feel flat. It wasn’t until I started actively practicing my strokes, focusing on confident, flowing lines rather than timid, scratchy ones, that things really clicked. Learning to effectively use brush stabilization features, understanding how to vary pressure for dynamic lines, and even just setting up a clean canvas with proper guides can drastically elevate your line art. Don’t be afraid to pull up reference photos, trace over them for practice to understand forms, and then apply those learnings to your original creations. It’s a continuous learning curve, but seeing your characters develop from a messy initial sketch into crisp, expressive line art is one of the most rewarding feelings. Plus, a solid foundation in line art makes the subsequent stages of coloring and rendering so much smoother and more enjoyable. It’s like building a house – a strong foundation means a stable, beautiful structure.
Brushwork and Beyond: Customizing Your Digital Toolkit
Ah, brushes! This is where digital art truly starts to feel personal and incredibly powerful. I can’t even count how many custom brushes I’ve downloaded, tweaked, and even created from scratch over the years. Every artist eventually finds their favorite set of brushes that just “feel right” for their style. For character design, having a good set of sketching brushes, inking brushes that give you crisp, clean lines, and various painting brushes for textures and blending is absolutely crucial. I personally love experimenting with brushes that mimic traditional media – charcoal, oil pastels, watercolors – because they add such a rich, organic feel to digital work. Don’t just stick with the default brushes your software comes with! Dive into the brush settings. Adjust the flow, opacity, scattering, texture, and even how pressure affects the brush’s size or color. It’s a rabbit hole, but a super fun and productive one. I vividly remember creating a custom brush that mimicked a particular gritty texture I loved for creature scales, and it completely transformed the look and feel of my monster designs. It’s not just about what brushes you have, but how you understand and manipulate their properties to achieve exactly the effect you’re going for. Think of your brush library as your personal arsenal; the more diverse and tailored it is to your needs, the more unique and expressive your characters will become. Don’t be afraid to get a little technical and really dig into those brush engine settings.
Layering Like a Pro: Organizing Your Canvas for Clarity
If there’s one piece of advice I wish I had taken more seriously early in my digital art journey, it’s this: master your layers! A well-organized canvas with clearly labeled layers is not just about neatness; it’s about efficiency, flexibility, and saving yourself massive headaches down the line. I’ve been there, working on a complex character piece with dozens of elements, only to realize I needed to adjust something on the line art layer that was buried under a hundred other unnamed layers. Nightmare! My current system involves separate layers for sketch, clean line art, flat colors, shadows, highlights, background elements, and special effects. Within those, I often use layer groups for different parts of the character – head, torso, limbs, clothing – to keep things even tidier. This not only makes it incredibly easy to make adjustments without affecting other parts of your drawing, but it also allows for non-destructive editing. You can experiment with different color palettes on a separate layer, try out various lighting scenarios, or even make significant changes to proportions without having to redraw everything. Understanding blending modes is another game-changer when it comes to layering. Modes like ‘Multiply’ for shadows, ‘Screen’ or ‘Overlay’ for highlights and glows, or ‘Color Dodge’ for intense light effects can add so much depth and atmosphere to your characters with minimal effort. Think of each layer as a transparent sheet you’re painting on; when combined, they form your complete artwork. It’s a fundamental concept, but its impact on your workflow and the quality of your final output is immense.
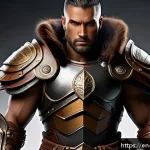
The Power of 3D: Sculpting and Posing for Dynamic Characters
Stepping into the world of 3D was genuinely transformative for my 2D character design work, and it’s something I urge every aspiring character artist to explore, even if just for a bit. Before I really dove into ZBrush and Blender, my characters often felt a little stiff, and I struggled with consistent perspective and complex poses. Learning to sculpt in 3D, even basic forms, gave me such a profound understanding of anatomy, volume, and how light interacts with surfaces that it completely leveled up my 2D drawings. Suddenly, I could visualize forms in space much more clearly. I remember feeling so intimidated by 3D software at first – all those buttons and menus! But once I got past that initial learning curve, it opened up a whole new world. Being able to sculpt a character, rotate it to any angle, and even pose it using simple rigging tools, provides an unparalleled reference. You can draw over your 3D model, use it to understand tricky foreshortening, or even just study how shadows fall on different planes. It’s not about becoming a 3D artist if you don’t want to be; it’s about leveraging 3D as an incredibly powerful tool to enhance your 2D creations. I’ve found that even quick, rough sculpts can save hours of agonizing over a difficult pose or a complex piece of armor. The tactile experience of sculpting digitally, pushing and pulling clay, is also incredibly satisfying and a wonderful way to understand form intuitively. Don’t let the complexity scare you; the payoff for your 2D work is immense.
Unleashing ZBrush: Organic Sculpting Made Easy
When it comes to organic sculpting, ZBrush is, in my opinion, the undisputed king. It’s a beast of a program, with a unique interface that can be a bit daunting at first, but once you get the hang of it, there’s nothing quite like it. The way ZBrush handles millions of polygons allows for an incredible level of detail, making it perfect for creatures, monsters, and highly detailed characters. I remember the first time I managed to sculpt a really convincing muscular arm in ZBrush; the feeling of control over the form, the ability to push and pull and refine like virtual clay, was exhilarating. Its array of brushes is specifically designed for sculpting, from basic clay build-ups to intricate alphas for skin textures, wrinkles, and scales. If you’re serious about creating characters with a strong sense of volume and realistic detail, ZBrush is an invaluable tool. Even if you’re primarily a 2D artist, using ZBrush to block out a character’s form and then rendering out different angles can serve as fantastic reference material for your illustrations. It teaches you to think in three dimensions, which is a skill that translates directly back to making your 2D drawings feel more grounded and believable. Plus, the community around ZBrush is incredibly supportive, with tons of tutorials available to help you on your journey. It’s an investment in your artistic skill set that pays dividends across all mediums.
Blender’s Versatility: Modeling, Rigging, and Rendering All-in-One
For artists looking for a more all-encompassing 3D solution without breaking the bank, Blender is an absolute powerhouse. The fact that it’s open-source and completely free is astonishing, considering its capabilities. Blender can do everything: modeling, sculpting (though ZBrush still holds an edge for organic detail), rigging, animation, rendering, and even video editing. It’s truly a one-stop shop for 3D creation. I started my 3D journey with Blender, learning the basics of box modeling, then eventually diving into sculpting. It’s a fantastic tool for creating props, weapons, and even entire environments for your characters to inhabit. For character designers, Blender’s rigging tools are a huge bonus. You can create a simple skeleton for your sculpt, pose your character dynamically, and then render out those poses as reference images for your 2D work. This is incredibly helpful for maintaining consistency in character design across different illustrations or panels. The Cycles and Eevee render engines produce stunning results, allowing you to experiment with different lighting setups and materials to see how your character would look in various scenarios. While the initial interface can be a little intimidating due to its sheer depth, the wealth of free tutorials available online makes learning Blender more accessible than ever. It’s an incredibly versatile tool that can elevate every aspect of your character design pipeline, from initial blocking to final presentation.
Elevating Your Art: Advanced Texturing, Lighting, and Rendering
So, you’ve got your character sculpted or drawn, the lines are crisp, the forms are solid – what’s next? This is where texturing, lighting, and rendering come into play, and frankly, this is where characters truly come alive. It’s about adding that extra layer of polish, that spark of realism or stylization that makes your character jump off the screen. For me, this stage is immensely satisfying because it’s where all the previous hard work culminates. I’ve personally spent countless hours experimenting with different texture brushes in Photoshop and Substance Painter, trying to get that perfect blend of rough leather, smooth metal, or soft fabric. It’s not just about slapping a texture on; it’s about understanding how materials behave in real life and translating that digitally. Think about the subtle imperfections, the worn edges, the way light catches different surfaces. Then there’s lighting – oh, the magic of lighting! A character can look completely different, evoke entirely new emotions, simply by changing the direction or color of your light sources. I’ve learned to pay close attention to rim lighting for separation from the background, key lighting to define form, and fill lighting to soften shadows. Mastering these elements transforms a good character design into a truly captivating one, creating depth and atmosphere that draws the viewer in. It’s where the technical artistry meets emotional storytelling, and it’s a phase of creation I absolutely adore.
Giving Life to Surfaces: Texture Painting Techniques
Texture painting is, in my book, one of the most crucial stages in bringing a character to life. It’s not just about adding detail; it’s about telling a story through the surfaces your character inhabits. Think about a weathered adventurer: their leather armor might show scuffs and scratches from countless battles, their worn cloak might have subtle fraying, and their skin might have sun-kissed freckles or scars. These aren’t just arbitrary details; they give the viewer clues about the character’s past and personality. I’ve personally found tools like Substance Painter to be absolute game-changers for 3D characters, allowing you to paint directly onto the model with incredible procedural capabilities. For 2D work, Photoshop and Clip Studio Paint offer powerful brush engines and blending modes to achieve similar results. My approach usually involves starting with broad, base textures and then layering on finer details – roughness, grime, subtle color variations, and specular highlights – that react to light. Don’t be afraid to use photo textures as a base, but always hand-paint over them to integrate them seamlessly into your style and avoid that “pasted on” look. Experiment with different brush settings to mimic various materials, and always, always consider how the texture would feel to the touch. It’s a meticulous process, but when you zoom in and see the subtle imperfections and rich details on your character’s costume or skin, that’s when you know you’ve nailed it.
The Magic of Light: Shaping Mood and Form
If texturing gives your character their skin, then lighting gives them their soul. Seriously, the impact of good lighting cannot be overstated. It’s not just about making things visible; it’s about directing the viewer’s eye, establishing mood, and dramatically enhancing the perception of form and volume. I used to just throw a general light on my characters and call it a day, and honestly, they often looked flat and uninspired. It was a massive revelation when I started studying cinematography and photography, understanding concepts like three-point lighting (key, fill, and back/rim light) and how different light temperatures evoke different feelings. A warm, golden light can suggest a cozy evening or a heroic moment, while a cool, blue light might imply mystery, sadness, or a futuristic setting. I love playing around with dramatic rim lighting to separate a character from the background and make them pop, or using strong, directional light to carve out features and create intense shadows that add gravitas. Whether you’re working in 2D with digital painting software or in 3D with render engines like Blender’s Cycles, understanding how light interacts with your character’s form is paramount. Experiment with different light sources, intensities, colors, and even reflections. It’s an art in itself, and when you get it right, your character won’t just be seen; they’ll be felt, enveloped in an atmosphere that speaks volumes about who they are and the world they inhabit.
Navigating the AI Frontier: Smart Tools for Concept Generation

The conversation around AI in art has been, to put it mildly, a whirlwind over the last couple of years, hasn’t it? As someone who’s always been fascinated by new technologies that enhance creativity, I’ve kept a very close eye on how AI is impacting character design. And let me tell you, it’s not about AI replacing artists – not by a long shot. Instead, I see it as an incredibly powerful new set of tools to augment our creative process, especially in the concept generation phase. Imagine needing to churn out dozens of unique character ideas for a game or animation project. Feeding a well-crafted prompt into an AI image generator can give you a starting point, a burst of visual inspiration, in minutes. I’ve personally used these tools to explore different costume designs, color palettes, and even fantastical creature features that I might not have thought of on my own. It’s like having an impossibly fast brainstorm partner who can generate endless variations on a theme. The key, however, is knowing how to guide the AI effectively and, crucially, knowing how to take what it produces and make it *yours*. It’s a springboard, not a finished product. We still need our unique artistic eye, our understanding of narrative, and our hands-on skills to refine, adapt, and truly bring these concepts to life with soul and intention. It’s a fascinating new frontier, and I believe that artists who learn to responsibly integrate AI into their workflow will find themselves with an exciting new edge.
Beyond the Prompt: Using AI as a Creative Partner
Successfully integrating AI into your character design workflow goes far beyond just typing a simple prompt and hoping for the best. It’s an art in itself, and I’ve spent a fair bit of time figuring out how to make these tools truly work *for* me, rather than just generating random images. Think of AI as a highly specialized, incredibly fast assistant that needs clear, detailed instructions. When I’m using an AI image generator for character concepts, I don’t just say “fantasy warrior.” I’ll specify gender, age, costume elements (e.g., “worn leather armor, intricate elven carvings, flowing cape”), color palettes (“deep emerald and gold accents”), mood (“stoic, battle-hardened”), and even artistic styles (“like a classic fantasy painting, but with a touch of art nouveau”). The more precise and descriptive your prompts, the closer you’ll get to something truly useful. But here’s the kicker: the real magic happens *after* the AI generates its initial ideas. That’s when I take the elements I like – a particular silhouette, an interesting piece of armor, a unique hairstyle – and use them as inspiration for my own sketches and paintings. It’s about cherry-picking the best ideas and then filtering them through my own artistic sensibilities, refining them, and injecting my personal style and narrative. It’s not about letting the AI do all the work; it’s about using it as a supercharger for your initial ideation phase, helping you explore more possibilities in less time. This collaborative approach ensures that the final character retains your unique voice and artistic vision.
Ethical AI Art: Navigating the New Digital Landscape
As exciting as the capabilities of AI art generators are, it’s absolutely crucial for us as artists to also engage with the ethical considerations that come with them. This is a conversation I’m constantly having with peers, and it’s something that really weighs on me. Many of these AI models are trained on vast datasets of existing artwork, often without the explicit consent or compensation of the original creators. This raises significant questions about copyright, intellectual property, and fair use. As someone who has poured countless hours into developing my own unique style and creating original characters, the idea of my work being used to train an AI without my knowledge or permission is concerning. So, what do we do? For me, it starts with being informed and making conscious choices. I prefer to use AI tools that are transparent about their training data or offer opt-out options for artists. When I *do* use AI for concept generation, I treat the output purely as a starting point for inspiration, not as a final product. I make sure to significantly transform and build upon whatever the AI generates, injecting my own hand-drawn elements, unique design choices, and artistic interpretation, so that the final piece is undeniably my own creation. It’s about maintaining artistic integrity and respect for fellow creators. We’re in a new era, and navigating it responsibly means being aware of these issues and advocating for solutions that protect artists and promote ethical innovation. The goal isn’t just to make great art, but to do so in a way that respects the entire creative ecosystem.
Building Your Arsenal: Essential Hardware for Digital Artists
Alright, we’ve talked a lot about software, but let’s not forget the unsung heroes of digital art: the hardware! While a powerful computer and a good drawing tablet might seem like obvious choices, the specifics can make a massive difference in your comfort, efficiency, and overall creative experience. I’ve learned this the hard way, hunching over a tiny screen or wrestling with a finicky pen. Investing in the right tools, for me, has been about more than just capability; it’s about creating an ergonomic and enjoyable workspace that supports long hours of creative flow without burnout. You don’t need the absolute top-of-the-line gear to start, but understanding what makes a difference can help you make smart choices as you upgrade. Things like screen resolution, color accuracy, and even the responsiveness of your stylus can impact your precision and the fidelity of your final artwork. I remember upgrading my old monitor to one with better color calibration, and suddenly, my printed artworks matched what I saw on screen – a huge relief! Beyond the basics, little things like a programmable keyboard, an ergonomic mouse for non-drawing tasks, and even a comfortable chair can contribute immensely to your long-term artistic health and productivity. Think about what bottlenecks your current setup might have and prioritize upgrades that address those issues first. Your body and your art will thank you for it!
The Graphics Tablet Deep Dive: Intuos, Cintiq, and Beyond
The graphics tablet is, without a doubt, the most essential piece of hardware for any digital artist. But oh, the choices! It essentially boils down to two main categories: pen tablets (where you draw on a surface and look at your monitor) and pen displays (where you draw directly on a screen). I started with a basic Wacom Intuos, and it was a fantastic entry point. It teaches you hand-eye coordination in a unique way and is incredibly durable. For many years, it was all I needed, offering superb pressure sensitivity and a natural drawing feel without breaking the bank. As my work became more demanding and my budget allowed, I eventually moved to a Wacom Cintiq, which is a pen display. Drawing directly on the screen felt like a revelation! It’s much more intuitive, akin to drawing on paper, and the direct feedback is invaluable for precision work. However, Cintiqs can be quite an investment. In recent years, brands like Huion and X-Pen have also stepped up their game, offering excellent pen displays at a more accessible price point, which is fantastic for artists on a tighter budget. And of course, the iPad Pro with the Apple Pencil has carved out its own niche, offering unparalleled portability and a fantastic drawing experience, especially with apps like Procreate. My advice is to consider your budget and your workspace. If you’re desk-bound and value precision above all, a Cintiq or a high-end Wacom tablet is great. If portability and an intuitive, direct drawing experience are key, the iPad Pro is a strong contender. If you’re just starting out or want a reliable workhorse without the screen, a good Intuos is still an excellent choice.
Picking the Right Monitor: Color Accuracy and Ergonomics
While the graphics tablet gets all the glory, your monitor is silently doing a huge amount of heavy lifting, especially when it comes to color and detail. Trust me, I’ve had my share of frustrating moments where an artwork looked vibrant on my screen but dull and desaturated when printed or viewed on a different device. This is where color accuracy becomes paramount. You want a monitor that can display a wide gamut of colors (look for sRGB, Adobe RGB, or DCI-P3 coverage) and, ideally, one that you can calibrate regularly. Brands like Dell UltraSharp, BenQ, and Eizo are often recommended for their professional-grade color accuracy. It’s not just about what colors it shows, but *how* accurately it shows them. Investing in a color calibration device can be a game-changer; it ensures that the colors you see on your screen are as true to life as possible. Beyond color, ergonomics play a huge role. As artists, we spend hours staring at screens, so a monitor that allows for height adjustment, tilt, and swivel can prevent neck strain and eye fatigue. Anti-glare coatings are also a lifesaver if your workspace has challenging lighting conditions. Don’t underestimate the impact of a good monitor on your overall comfort and the professional quality of your final output. It’s an investment that pays off in both your physical well-being and the fidelity of your art.
Workflow Wisdom: Streamlining Your Creative Process
You know, for all the talk about amazing software and fancy hardware, one of the biggest leaps in my own artistic journey came from simply optimizing my workflow. It’s not always about having the newest gadget; sometimes, it’s about making the most of what you’ve got and creating smart habits that let your creativity flow without unnecessary friction. I used to spend so much time fumbling through menus, manually selecting tools, or searching for files that it would genuinely pull me out of my creative zone. Now, I’ve got my workspace dialed in. My most used tools are always visible, my favorite brushes are organized, and I’ve got hotkeys for everything I do frequently. It’s like building a well-oiled machine around your creative process. Think about where you spend the most time doing repetitive tasks, or where you get bogged down. Is it file management? Layer organization? Color picking? There’s almost always a smarter, faster way to do it. Experiment with different approaches, watch tutorials on workflow hacks, and don’t be afraid to customize your software to fit your unique needs. A streamlined workflow isn’t just about saving time; it’s about minimizing distractions and maximizing the time you spend actually creating, which ultimately leads to more enjoyable art-making and, let’s be honest, better results. Every little efficiency you gain means more energy directed towards bringing those amazing characters to life!
Hotkeys and Macros: Speeding Up Your Workflow
If you’re still painstakingly clicking through menus for every tool change, let me tell you, you’re missing out on a huge workflow superpower: hotkeys and macros! Seriously, learning and customizing keyboard shortcuts can shave hours off your creative process and keep you in that coveted flow state. I remember when I first made a conscious effort to memorize the hotkeys for my most-used actions in Photoshop – brush, eraser, eyedropper, undo, flip canvas – and it felt like unlocking a cheat code. My hand rarely leaves the keyboard now, and the seamless transition between tools is incredibly liberating. But it goes beyond just basic shortcuts. Most modern art software allows you to create custom hotkeys for almost any action, and some even let you record macros, which are sequences of actions that can be executed with a single keypress. Imagine a macro that automatically creates a new layer, sets it to ‘Multiply’ blending mode, and fills it with a neutral gray for shading – all with one tap! I use macros extensively for things like creating new clipping masks, setting up quick color adjustments, or even toggling specific layer visibility. It’s a little bit of upfront effort to set them up and memorize them, but the payoff in terms of speed and uninterrupted creativity is absolutely enormous. Your hands will thank you, and your art will flow more freely when you’re not constantly navigating through cumbersome menus.
Backup Strategies: Protecting Your Precious Artwork
Oh, the horror stories I could tell you about lost artwork! Hard drives crashing, software glitches, accidental deletions – I’ve either experienced them myself or watched countless friends go through the agony of losing days, weeks, or even months of work. And let me tell you, it’s one of the most soul-crushing experiences an artist can go through. This is why having a robust backup strategy isn’t just a good idea; it’s absolutely non-negotiable. Your artwork is your livelihood, your passion, your creative output – protect it! My personal setup involves a multi-pronged approach. Firstly, I save incrementally throughout my process (e.g., character_design_v01, character_design_v02, etc.). Secondly, I regularly save to an external hard drive. Thirdly, and perhaps most importantly, I use cloud storage services like Google Drive or Dropbox. This ensures that even if my house burns down (knock on wood!), my precious files are safe off-site. Some artists even use version control software, which is fantastic for collaborative projects or highly iterative work. Don’t wait until disaster strikes to think about backups. Set up an automated system if you can, or at least make a habit of backing up your current projects at the end of each work session. It takes a few minutes, but that peace of mind is absolutely priceless. You’ve poured your heart and soul into those characters; make sure they’re protected!
Wrapping Up Our Creative Journey
Whew! We’ve covered a lot of ground today, haven’t we? From finding that perfect digital brush to ethically exploring the brave new world of AI in art, and even talking about keeping our bodies happy through all those long drawing sessions. It truly feels like we’ve shared some serious insights that I’ve gathered over my own artistic adventures. My biggest hope is that this deep dive helps you feel more confident and inspired on your character design journey. Remember, the tools are just extensions of your vision, and your unique perspective is what truly makes your art special. So go forth, experiment, create, and most importantly, enjoy every single stroke and sculpt!
Useful Information for Your Artistic Path
1. Start Small, Dream Big – And Experiment Relentlessly: You absolutely don’t need the most expensive gear to kickstart your digital art journey. I’ve seen incredible art made on entry-level tablets and free software like Krita or Blender. Seriously, try out all the trial versions you can get your hands on! Remember that time I almost bought a super high-end pen display only to realize a more portable, affordable option suited my spontaneous sketching style much better? Your perfect tool is the one that feels right for *you*, not necessarily the one with the biggest price tag or the most hype. Borrow a friend’s tablet, download demos, or even check out free drawing apps. The goal is to discover your natural workflow before making a big investment, ensuring every dollar spent truly enhances your creative process and minimizes that frustrating learning curve.
2. Community is Your Creative Fuel – Don’t Go It Alone: Seriously, one of the best things I ever did for my art was connecting with other artists. The digital art world can feel isolating sometimes, but there are vibrant communities out there waiting for you. Dive into platforms like ArtStation’s forums, Reddit communities like r/digitalart, or even specialized Discord servers where artists share tips, offer critiques, and cheer each other on. I’ve learned so much from seeing other artists’ processes and getting honest feedback on my own work. It’s a fantastic way to stay motivated, discover new techniques, and even find opportunities for collaboration. Don’t be shy; jump in and share your journey – you’ll be amazed at the support and knowledge you’ll gain!
3. Prioritize Your Well-being – Your Body is Your Temple (and Your Main Tool!): As digital artists, we spend hours hunched over screens, gripping styluses, and clicking away. Trust me, ignoring ergonomics is a recipe for pain and burnout. I learned this the hard way with a nasty wrist strain years ago! Invest in a good ergonomic chair, adjust your monitor to eye level, and ensure your drawing tablet is comfortably positioned. Take regular breaks to stretch, walk around, and rest your eyes (the 20-20-20 rule is a lifesaver!). My current setup allows me to alternate between sitting and standing, which has been a game-changer for my back and energy levels. Your physical health directly impacts your creative output, so treat your body with the same care and attention you give your art.
4. Beyond Passion: Strategize for Monetization and Sustainable Artistry: While we all create because we love it, making a living from art requires smart strategies. Beyond AdSense, which provides a base income from blog traffic, consider diversifying your revenue streams. I’ve explored everything from selling physical prints and digital products (like custom brushes or tutorials) to accepting commissions for character designs. Platforms like Patreon are excellent for building a supportive community and offering exclusive content, creating a more stable income stream. Don’t be afraid to offer your expertise through workshops or even sell merchandise with your character designs. The key is finding what resonates with your audience and consistently delivering value, turning your passion into a sustainable career.
5. Cultivate Your Online Presence – Your Portfolio is Your Digital Handshake: In today’s interconnected world, your art isn’t truly “seen” until it’s online. A strong digital portfolio is absolutely essential. Sites like ArtStation, Behance, Adobe Portfolio, or even a custom website built with platforms like Wix or Journo Portfolio, are your storefronts to the world. Curate your best work, showcase your unique style, and make it easy for potential clients or collaborators to find you. Regularly share your work-in-progress, behind-the-scenes glimpses, and finished pieces across social media. This builds an audience, establishes your brand, and most importantly, gets your incredible characters in front of the people who will appreciate them most. Remember, visibility is key to opportunity!
Key Takeaways for Your Creative Journey
My artistic journey, much like yours, has been a continuous process of learning, experimenting, and adapting. The core message I truly want to impart is this: your unique artistic vision is paramount, but the right tools and a smart workflow act as powerful accelerators. Don’t chase trends for the sake of it; instead, seek out software and hardware that genuinely resonate with your style and help you express your creativity most effectively. Mastering the fundamentals of art is non-negotiable – digital tools enhance skills, they don’t replace them. Moreover, embracing the evolving landscape, including AI as a creative assistant for ideation, can open up exciting new avenues, provided we navigate these advancements ethically and consciously. And please, don’t forget the importance of community support and safeguarding your own well-being. By focusing on these pillars – personalized tools, foundational skills, an optimized workflow, ethical innovation, and community engagement – you’re not just creating characters; you’re building a thriving, fulfilling artistic practice.
Frequently Asked Questions (FAQ) 📖
Q: With so many digital art tools available, how do I pick the “best” one for character design, especially if I’m just starting out or looking to upgrade my existing toolkit?
A: Oh, I totally get this struggle! Walking into the digital art store (or just browsing online) can feel like a kid in a candy shop, but also a bit overwhelming, right?
The truth is, there’s no single “best” tool; it really boils down to your personal workflow, what kind of characters you’re designing, and honestly, your budget.
When I started, I felt like I needed to master everything, but that just led to burnout. I’ve learned that it’s smarter to pick tools that align with your primary needs.
If you’re all about that portable, intuitive drawing experience, especially for 2D illustrations and quick concept sketches, Procreate on an iPad is a game-changer.
It’s incredibly user-friendly, and the brush engine feels super natural, almost like traditional media in your hands. I often start my character ideas here because it feels so immediate.
However, if you need something with robust photo manipulation, intricate texturing, and deep professional-grade features for complex, layered projects, Adobe Photoshop is still the industry standard.
It has a steeper learning curve, but its versatility is unmatched, especially for detailed finishing touches. I pretty much live in Photoshop for my final renders!
For those venturing into the exciting world of 3D character sculpting, you’ve got two big contenders: ZBrush and Blender. ZBrush is a dedicated sculpting powerhouse, truly king for organic forms and extreme detailing – it’s like sculpting digital clay.
Blender, on the other hand, is a fantastic all-in-one open-source solution that covers everything from modeling, sculpting, rigging, animation, and rendering.
While its sculpting might not be as specialized as ZBrush’s, its overall capabilities are phenomenal, especially if you want to handle the entire 3D pipeline yourself without switching software.
I’ve personally found a great workflow by using ZBrush for the initial high-detail sculpts and then bringing them into Blender for retopology, rigging, and rendering.
And hey, for comic and manga artists, Clip Studio Paint is often lauded for its specialized tools, like perspective rulers and vector layers, which are incredibly helpful for line art consistency.
Don’t be afraid to try out trials and see what clicks with your creative flow!
Q: AI is such a hot topic! How can I integrate
A: I tools into my character design process effectively without feeling like I’m losing my unique artistic touch or “cheating”? A2: Oh, the AI conversation!
It’s definitely buzzing, and I’ve seen a lot of artists grapple with this. I totally understand the apprehension – feeling like your unique voice might get lost or that you’re somehow taking a shortcut.
But from my experience, AI isn’t here to replace us; it’s a phenomenal assistant if you learn how to wield it. Think of it as a super-powered brainstorming partner.
I’ve personally integrated AI into my early ideation phase, and it has been incredible for breaking through creative blocks. For instance, if I’m stuck on a new character concept, I might feed a few keywords into tools like MidJourney or Stable Diffusion to generate a mood board of initial silhouettes, color palettes, or costume ideas.
It’s like getting hundreds of quick concept sketches in minutes! This helps me explore a wider range of possibilities much faster than I ever could by hand.
Tools like Leonardo AI or even specific consistent character generators (I’ve played with Dzine AI for this!) are becoming really good at maintaining a character’s core look across different poses or scenes, which can save a ton of time on iterative work.
The “magic” happens when you take these AI-generated sparks and infuse your own artistic judgment, refinement, and unique style. I don’t just use what AI gives me; I treat it as a jumping-off point.
I’ll pick elements, redraw them, combine them, and then add my personal touch – the subtle expressions, the specific brushstrokes, the narrative details that only I can bring.
It’s about letting AI do the heavy lifting of raw ideation so you can focus your precious creative energy on what truly makes your art yours. It’s about enhancement, not replacement.
Q: Beyond just picking the right software, what practical steps can I take to truly optimize my character design workflow and boost my efficiency?
A: This is where the real game-changers happen, my friend! I used to think more tools equaled better art, but it’s really about how you use them. Optimizing your workflow isn’t just about speed; it’s about reducing friction so your creative flow isn’t constantly interrupted.
One thing that truly changed my game was setting up custom brushes and palettes for recurring styles or projects. Whether it’s in Procreate or Photoshop, having my favorite sketching brush, my go-to inking pen, or a project-specific color palette immediately accessible saves me precious minutes and keeps me in the zone.
Another huge tip is mastering hotkeys and shortcuts. Seriously, learning those keyboard commands for common actions – zooming, rotating, changing brush sizes, toggling layers – will make you feel like a digital ninja.
I used to spend so much time clicking through menus, but now my hands just fly across the tablet and keyboard. Also, maintaining a clean layer structure from the get-go is vital.
Naming your layers and grouping them logically might seem tedious at first, but when you come back to a complex file, or need to hand it off, you’ll thank yourself (and so will anyone collaborating with you!).
And don’t forget the power of good reference! Before I even touch a pen, I spend a bit of time gathering inspiration – whether it’s real-world fashion, anatomical studies, or other artists’ work.
Tools like PureRef are fantastic for organizing these. Breaking down complex characters into simpler forms before diving into detail is another trick I swear by.
Start with basic shapes, build the silhouette, then add anatomy, clothing, and finally, the intricate details. This structured approach, combined with regular practice and not being afraid to experiment, will make your artistic journey smoother and more rewarding than you can imagine.
Keep creating!