In today’s fast-evolving creative landscape, mastering character design has become more crucial than ever for artists and storytellers alike. Whether you’re aiming to break into the animation industry or simply want to bring your unique characters to life, preparing like a pro is the key to standing out.

Recently, there’s been a surge in demand for character designers who can blend originality with technical skill, making the learning journey both exciting and essential.
If you’ve ever wondered how to approach character design lectures effectively, you’re in the right place. Let’s dive into the essential steps that will help you prepare confidently and elevate your craft to the next level.
Building a Strong Foundation in Character Anatomy
Understanding Proportions and Silhouettes
Mastering character anatomy starts with grasping the fundamental proportions that make a character believable. Whether your style leans towards realism or stylized exaggeration, knowing how to balance head size, limb length, and torso shape is essential.
I remember struggling initially with inconsistent proportions, but once I focused on silhouette clarity, my designs became instantly more readable and appealing.
Silhouettes serve as the first impression; if the shape reads well in black and white, your character will stand out even in complex scenes. To practice, sketch basic shapes and exaggerate their features while maintaining balance—this builds your intuition for dynamic poses and unique character builds.
Expressing Emotion Through Anatomy
Beyond static anatomy, conveying emotion through posture and facial expressions is what breathes life into characters. In lectures, focusing on how subtle shifts in shoulders, spine curves, or eye shapes communicate mood can transform a flat design into a relatable personality.
For example, a slouched posture paired with droopy eyes immediately signals sadness, while an upright stance with a lifted chin exudes confidence. Practicing these nuances helps you teach students how to embed storytelling within anatomy itself, which is often overlooked but critical for animation and comics.
Using References Without Losing Originality
References are gold, but relying on them too heavily can dilute your creative voice. I often advise emerging artists to gather diverse reference materials—from fashion magazines to wildlife photography—and then mix and morph these into fresh concepts.
During preparation, setting a limit on direct copying forces you to interpret and innovate, which is the hallmark of strong character design. Teaching how to balance reference use ensures students don’t get stuck in imitation but build their own visual language.
Crafting Unique Personalities Through Design Elements
Choosing the Right Color Palette
Colors aren’t just decoration; they’re an emotional shorthand that can define a character’s mood, background, and role in the story. When preparing lectures, I emphasize experimenting with color theory basics—warm tones suggest energy or aggression, while cool tones evoke calm or mystery.
I’ve found that creating mood boards with complementary and analogous colors helps students visualize how palette choices affect perception. Encouraging them to test colors digitally or with markers before finalizing designs fosters confidence in their color decisions.
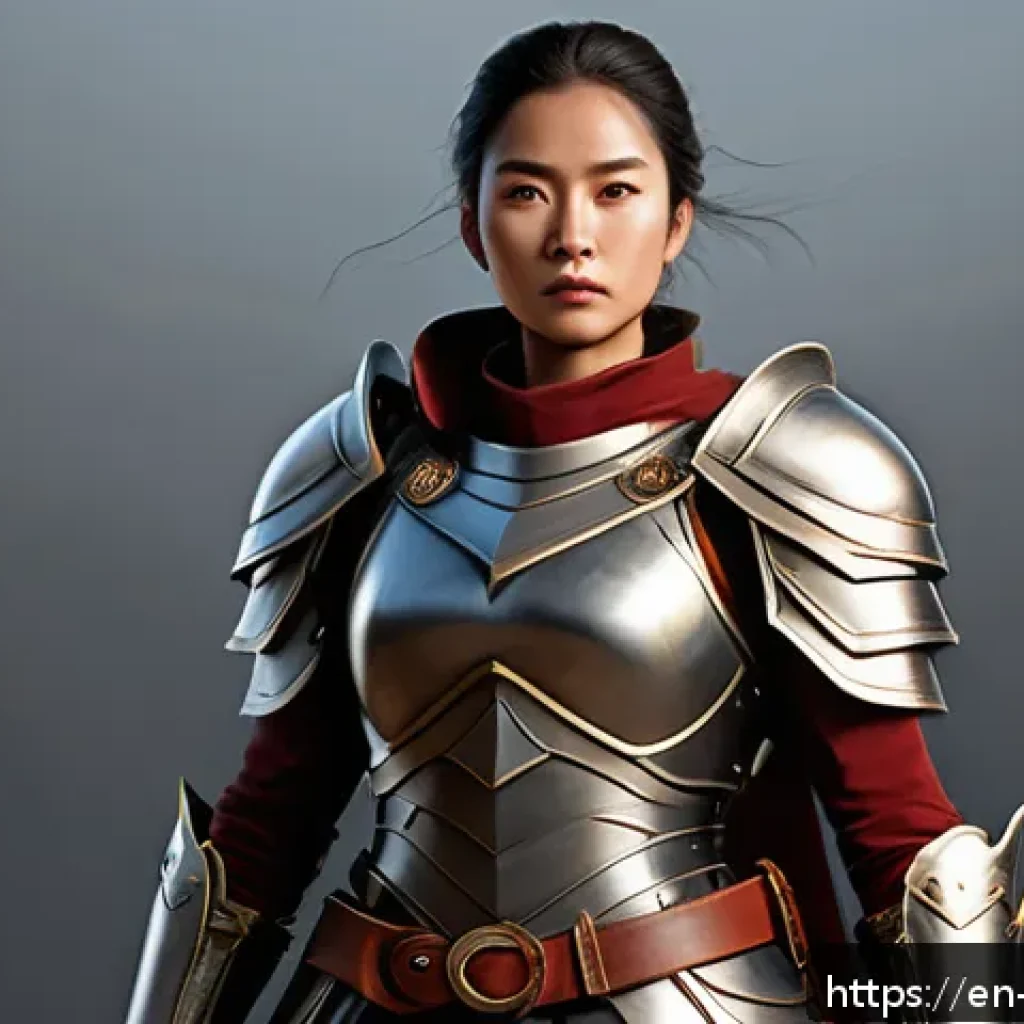
Designing Costumes with Purpose
Clothing and accessories tell stories about a character’s environment, occupation, and personality. In my experience, teaching students to think beyond aesthetics and consider practicality or cultural relevance elevates their designs.
For example, a warrior’s armor should reflect not only the era but also their fighting style and social status. I like to incorporate real-world costume studies and ask students to imagine how each garment moves or wears down over time, adding layers of realism and depth.
Integrating Symbolism and Iconography
Symbols embedded in design can add subtle hints about a character’s backstory or values, enriching the narrative without explicit exposition. I encourage exploring cultural motifs or abstract shapes that resonate with the character’s journey.
For instance, a recurring spiral pattern might symbolize growth or cycles, while sharp angles could suggest conflict or danger. This approach helps students think conceptually, pushing their designs beyond surface-level appeal.
Mastering Digital Tools and Techniques
Selecting Software That Matches Your Workflow
The digital landscape offers countless tools—Photoshop, Procreate, Clip Studio Paint, to name a few—but choosing the right one can streamline your creative process dramatically.
I’ve personally switched between programs and noticed how each affects my drawing speed and style. When preparing for lectures, I highlight key features like brush customization, layering, and vector support to help students find what suits their needs.
Setting up templates and shortcuts beforehand also saves valuable time during intense design sessions.
Utilizing Layers and Masks Effectively
Layers and masks aren’t just technical features; they’re creative allies that allow you to experiment freely without fear of ruining your work. Teaching students how to separate line art, colors, shadows, and highlights into distinct layers makes editing easier and encourages iterative improvements.
Masks, in particular, enable precise adjustments and blending effects that can elevate the polish of a character design. Sharing tips on organizing layers systematically helps maintain clarity in complex projects.
Incorporating Texture and Detail
Adding texture—whether it’s fabric weave, skin pores, or worn metal—gives characters tactile realism that draws viewers in. I’ve found that combining custom brushes with photo overlays can produce rich surfaces without spending hours on manual detailing.
Preparing tutorials on creating and applying textures digitally equips students with techniques to enhance their art’s depth and authenticity. It’s also a great way to differentiate characters by their unique material qualities.
Developing a Compelling Backstory and Personality
Linking Design Choices to Character History
A character’s look should reflect their life experiences, beliefs, and ambitions. When guiding students, I stress the importance of asking “why” behind every design decision.
For example, scars, worn clothing, or specific color choices often hint at past events or personality traits. This process helps prevent random aesthetic choices and builds a cohesive narrative that informs pose, expression, and costume.
Sharing case studies of well-known characters reveals how backstory fuels design.
Creating Personality Through Behavior and Expression
Beyond static visuals, portraying how a character moves, reacts, and interacts is key to making them believable. I encourage students to develop character sheets with different facial expressions and body language poses to explore emotional range.
Role-playing or imagining dialogue scenarios helps solidify these traits. This practice not only aids animators and illustrators but also strengthens storytelling skills.

Balancing Complexity and Clarity
While rich detail is enticing, overcomplicating a design can confuse audiences or slow production. Teaching students to prioritize signature features and simplify secondary elements keeps characters memorable and manageable.
I like to use the analogy of iconic logos—simple shapes with strong identities—applied to character traits. This balance is crucial, especially in animation, where clarity at different scales is a must.
Engaging Your Audience with Story-Driven Presentation
Structuring Your Lecture for Maximum Impact
How you present information can be as important as the content itself. I’ve learned that starting with broad concepts before zooming into details keeps learners engaged and prevents overwhelm.
Using real-time sketching or interactive Q&A segments breaks monotony and encourages participation. Preparing clear visual aids—like before-and-after design evolutions—helps illustrate points vividly.
Incorporating Hands-On Exercises
Nothing beats learning by doing. I always recommend integrating exercises where participants create quick thumbnails or redesign existing characters based on specific prompts.
This approach cements theory through practice and sparks creativity. Sharing personal anecdotes about my own trial-and-error moments makes the atmosphere more relatable and less intimidating.
Utilizing Feedback Loops
Constructive critique is vital for growth. Setting up peer review sessions or live critique rounds fosters a supportive community and sharpens observational skills.
I’ve noticed that when students verbalize their design rationale and listen to others’ perspectives, their work improves faster. Preparing guidelines for respectful, focused feedback ensures the process remains positive and productive.
Organizing Resources for Continued Learning
Curating Inspirational Material
Having a go-to collection of references—from classic animation reels to contemporary concept art—fuels ongoing creativity. I often compile playlists, artbooks, and online portfolios tailored to different styles and skill levels.
Sharing these during lectures provides students with trusted sources to explore independently, keeping their motivation high.
Building a Personalized Workflow
Encouraging students to develop their own routines—from sketching rituals to digital file organization—boosts efficiency and reduces burnout. I share my habit of daily quick sketches to warm up and how I archive designs by project and date for easy retrieval.
This kind of structure supports sustained improvement and professional readiness.
Setting Realistic Goals and Milestones
Long-term progress hinges on measurable objectives. Advising students to break down their ambitions into achievable steps—such as mastering anatomy before tackling complex textures—keeps them focused and less overwhelmed.
Tracking progress visually, like with mood boards or progress charts, also provides motivation and a sense of accomplishment.
| Preparation Aspect | Key Focus | Recommended Tools or Methods | Common Pitfalls |
|---|---|---|---|
| Character Anatomy | Proportions, Silhouettes, Emotion | Life drawing, silhouette sketches, anatomy apps | Overcomplicating forms, ignoring readability |
| Design Elements | Color Theory, Costume Functionality, Symbolism | Mood boards, cultural research, color palette generators | Clashing colors, irrelevant accessories |
| Digital Techniques | Software Choice, Layer Management, Texturing | Photoshop, Procreate, custom brushes | Poor layer organization, over-texturing |
| Backstory Integration | Design Rationale, Personality Expression | Character sheets, role-playing exercises | Disconnected design and story |
| Presentation Skills | Lecture Structure, Interactive Exercises, Feedback | Slide decks, live demos, critique sessions | Monotonous delivery, lack of engagement |
| Resource Management | Inspirational Material, Workflow, Goal Setting | Art libraries, personal schedules, progress tracking | Information overload, unrealistic goals |
In Conclusion
Building strong character designs is a journey that blends anatomy, storytelling, and technical skills. By focusing on proportion, emotion, and purposeful design choices, you create memorable and authentic characters. Embracing digital tools and continuous learning further refines your craft. Remember, every detail should serve the character’s story and personality to truly resonate with your audience.
Helpful Information to Keep in Mind
1. Consistent practice with silhouette sketches sharpens your ability to create clear and dynamic character shapes.
2. Experimenting with color palettes can dramatically influence how a character’s mood and role are perceived.
3. Using layers and masks effectively in digital software allows for flexible editing and professional polish.
4. Developing backstory-linked design elements adds depth and prevents random or disconnected visual choices.
5. Incorporating feedback and hands-on exercises accelerates growth and builds confidence in your design skills.
Key Takeaways
Prioritize clarity and purpose in every aspect of your character creation process. Balance creativity with practical design choices that reflect your character’s history and personality. Utilize digital tools thoughtfully to enhance your workflow without overwhelming your art. Engage with your audience through story-driven presentations and continuous improvement. Most importantly, stay curious and patient—mastery comes with time and dedication.
Frequently Asked Questions (FAQ) 📖
Q: uestions about Preparing for Character Design LecturesQ1: What are the most important skills to focus on when preparing for a character design lecture?
A: When gearing up for a character design lecture, honing your foundational drawing skills is essential—think anatomy, gesture, and expression. But beyond that, understanding storytelling and personality traits can really set your characters apart.
I found that practicing quick sketches to capture different emotions and poses helped me stay flexible and creative during lectures. Also, familiarizing yourself with popular design software like Photoshop or Procreate can give you a technical edge.
Combining artistic fundamentals with these tools ensures you’re ready to absorb and apply the lessons effectively.
Q: How can I make the most out of a character design lecture if I’m a beginner?
A: As a beginner, it’s easy to feel overwhelmed, but the key is to stay curious and patient with yourself. I recommend coming in with a notebook or digital device ready to jot down insights and questions.
Don’t hesitate to ask for feedback or clarification during the session—engagement really deepens your understanding. Also, try to apply what you learn immediately by doing small character sketches or redesigning existing characters; this hands-on practice cements the concepts.
Remember, progress in character design is a journey, so celebrate small wins along the way.
Q: Are there any common pitfalls to avoid when learning character design through lectures?
A: Absolutely, and I’ve stumbled on a few myself. One big pitfall is trying to mimic styles exactly without understanding the why behind the design choices.
This can stunt your creative growth. Instead, focus on grasping the principles and then experiment with your own ideas. Another mistake is neglecting the storytelling aspect—characters need backstories and emotions to feel alive.
Lastly, don’t rush the process; character design is iterative. Take your time refining your sketches and be open to revisiting your work after the lecture to deepen your skills.