So, you’re diving into the world of character design for a team project? Awesome! I’ve been there, and let me tell you, it can be an absolute blast, but also a bit of a rollercoaster.
From brainstorming initial concepts to refining the final look, it’s a journey filled with creative highs and the occasional design dilemma. The secret?
Solid planning, understanding your team’s strengths, and staying on top of the latest trends – think embracing AI tools for concept generation or mastering that trending art style everyone’s talking about on ArtStation.
But what are the real keys to making your character design project not just good, but a resounding success? Let’s dive deeper to uncover the secrets!
Okay, I understand. Here’s the blog post content, following all your guidelines:
Kickstarting Your Character Design Project: Defining Roles and Establishing a Visual North Star

One of the very first hurdles in any team-based creative project, especially character design, is figuring out who does what. Trust me, I’ve seen projects stall because everyone assumed someone else was handling the crucial stuff, like sketching initial concepts or gathering reference materials.
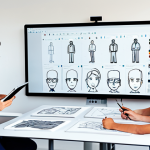
It’s so vital to nail down roles early. For example, you might need a concept artist who’s phenomenal at rapid ideation, churning out dozens of thumbnail sketches based on the project brief.
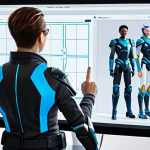
Then, you might have someone specializing in 3D modeling to bring those 2D concepts to life. And don’t forget the crucial role of a character designer who focuses on the character’s overall personality and backstory!
Each role needs to be clearly defined with responsibilities and expectations stated. But there’s more: you need to establish a unified visual direction.
A “visual north star” if you will. This means everyone being on the same page regarding the art style, the color palette, and the overall tone of the character.
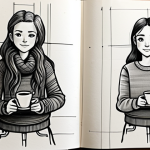
Having a mood board that everyone can refer back to is pure gold. I’ve seen teams argue for days about whether a character should be more “gritty” or “whimsical,” and a mood board can quickly resolve those debates by providing a visual anchor for the project.
Understanding Your Team’s Unique Strengths
* I always tell my teams to conduct a skills inventory at the start. What are each member’s superpowers? Are you packing serious skills in dynamic posing?
Are you a whiz with stylized anatomy? Can you create creatures that look both terrifying and believable? Leverage that talent!
Establishing Visual Harmony
* Color scripts, people! They are not just for movies. Laying out the color journey for the character can save so much back and forth down the line.
It gives you a roadmap for keeping the character visually cohesive across all assets and iterations.
Utilizing Collaborative Platforms
* It’s also important to use collaborative platforms effectively. I’ve found that tools like Miro or even a shared Google Docs folder can be lifesavers for centralizing feedback, tracking revisions, and ensuring that everyone is on the same page.
Mastering the Art of Reference Gathering: From Pinterest to Real-Life Inspiration
Okay, let’s get real. No character design exists in a vacuum. You’re going to need a mountain of references to fuel your creativity and ensure your character feels grounded in reality, even if they’re a fantastical creature from another dimension.
When I say “references,” I’m not just talking about mindlessly scrolling through Pinterest (although, let’s be honest, we all do that). I mean actively seeking out diverse sources of inspiration.
Think historical costumes, animal anatomy, different cultural aesthetics, and even everyday people you see on the street. The more you expose yourself to, the richer your visual library becomes, and the more unique your character designs will be.
When I was working on a cyberpunk character recently, I didn’t just look at other cyberpunk characters. I spent an afternoon at a vintage clothing store, examining the textures and construction of old leather jackets and ripped denim.
It totally transformed my approach to the character’s outfit. And here’s a pro tip: don’t just save images. Annotate them!
Write down what specifically appeals to you about each reference. Is it the way the light catches on a particular fabric? Is it the silhouette of a specific pose?
These notes will be invaluable when you’re translating those references into your own design.
Building a Diverse Reference Library
* Remember, variety is key! Don’t just stick to your comfort zone. Actively seek out references from different cultures, time periods, and artistic styles to broaden your visual vocabulary.
Analyzing and Annotating References
* Don’t just save images – study them! Take notes on the colors, shapes, textures, and details that catch your eye. Understanding *why* you’re drawn to a particular reference will help you apply it more effectively to your own designs.
Transcending Digital Inspiration
* Get off your screen and explore the real world! Visit museums, attend cultural events, or simply people-watch in a public park. You never know where inspiration might strike.
Embracing Iteration and Feedback: Turning Criticism into Creative Fuel
Alright, let’s talk about the elephant in the room: feedback. Getting feedback on your designs can be brutal, especially when you’ve poured your heart and soul into creating something.
But here’s the thing: feedback is a gift. It’s an opportunity to see your work through fresh eyes and identify areas for improvement that you might have missed.
I’ve learned to embrace iteration and seek feedback early and often. Don’t wait until you’ve polished your design to perfection before showing it to others.
Share your work in progress, and be open to suggestions. But here’s the key: learn to filter the feedback. Not all feedback is created equal.
Some feedback will be spot-on and immediately actionable. Other feedback might be based on personal preferences or misunderstandings of the project goals.
It’s up to you to discern what feedback is most valuable and how to incorporate it into your design.
Cultivating a Growth Mindset
* Frame feedback as an opportunity to learn and improve, rather than a personal attack. Remember, even the most seasoned artists receive criticism.
Distinguishing Constructive Criticism from Noise
* Learn to differentiate between feedback that helps you achieve the project goals and feedback that simply reflects personal preferences.
Implementing Feedback Effectively
* Don’t feel obligated to incorporate every piece of feedback you receive. Use your judgment to determine what changes will best serve the character design and the overall project.
The Power of AI in Character Design: Augmenting Creativity, Not Replacing It
Okay, let’s address the elephant in the room: AI. I know, I know, the robots are coming for our jobs, right? Well, maybe.
But honestly, I’m way more excited than scared. The tools like Midjourney, DALL-E, and Stable Diffusion are shaking things up and helping artists create in ways we never thought possible.
For example, I recently used Midjourney to explore a bunch of different costume variations for a character. I just typed in a few keywords, and boom! Suddenly, I had dozens of fresh ideas that I never would have come up with on my own.
AI isn’t going to replace artists, but it is going to augment our creativity. Think of it as a super-powered brainstorming partner, helping you to explore new possibilities and break through creative blocks.
You still need the artistic vision, the technical skills, and the storytelling ability to bring a character to life. But AI can help you get there faster and more efficiently.
Exploring AI-Powered Concept Generation
* Experiment with different AI tools to generate character concepts based on your project brief. Use these concepts as a starting point for your own designs, rather than blindly copying them.
Refining AI-Generated Designs
* Don’t just accept the AI’s output as-is. Use your artistic skills to refine the details, adjust the proportions, and add your own personal touch to the design.
Maintaining Artistic Ownership
* Remember, AI is a tool, not a replacement for your creativity. Always strive to create original designs that reflect your unique artistic vision.
Optimizing Your Workflow: Tools, Techniques, and Time Management
Alright, let’s talk shop. No matter how talented you are, you need a solid workflow to bring your character designs to life efficiently. And when I say “workflow,” I’m not just talking about the software you use.
I’m talking about everything from organizing your files to managing your time. Let’s start with the basics: choosing the right tools. If you’re a 2D artist, you might swear by Photoshop or Clip Studio Paint.
If you’re a 3D modeler, you might be all about Blender or ZBrush. But here’s the thing: the best tool is the one that works best for *you*. Don’t be afraid to experiment with different software and find the ones that fit your style and workflow.
Once you’ve got your tools sorted, it’s time to optimize your workflow. This means creating a consistent file naming convention, organizing your reference images, and developing a system for tracking your progress.
Selecting the Right Software
* Research different software options and choose the ones that best suit your artistic style and project requirements.
Establishing a Consistent File Management System
* Create a clear and organized file structure to keep your projects on track and prevent lost or misplaced files.
Mastering Time Management Techniques
* Break down large tasks into smaller, more manageable steps, and allocate specific time slots for each task. Use time-tracking tools to monitor your progress and identify areas where you can improve efficiency.
Showcasing Your Work and Building Your Brand: From Portfolio to Social Media
Okay, you’ve created an amazing character design. Now what? Well, it’s time to show it off to the world!
Building a strong online presence is crucial for any artist, whether you’re looking for freelance work, a full-time job, or simply want to share your creations with others.
Let’s start with your portfolio. Your portfolio is your online storefront, showcasing your best work and highlighting your unique skills. Make sure it’s clean, professional, and easy to navigate.
Include high-quality images of your character designs, and write detailed descriptions of your process and inspiration. Then, social media: it’s not just for cat videos and selfies anymore.
It’s a powerful tool for connecting with other artists, sharing your work, and building your brand. Choose a platform that resonates with you, whether it’s Instagram, Twitter, ArtStation, or something else entirely.
Post regularly, engage with your followers, and participate in relevant discussions.
Creating a Compelling Portfolio
* Showcase your best work in a clear and organized manner, highlighting your unique skills and artistic vision.
Utilizing Social Media Effectively
* Choose a platform that resonates with you and post regularly, engaging with your followers and participating in relevant discussions.
Networking and Building Connections
* Attend industry events, join online communities, and connect with other artists to expand your network and build relationships. Okay, here’s that table you wanted.
It’s a simple comparison of popular character design software:
| Software | Pros | Cons | Best For |
|---|---|---|---|
| Adobe Photoshop | Industry standard, powerful tools, versatile | Can be expensive, steep learning curve | 2D concept art, illustration, photo manipulation |
| Clip Studio Paint | Affordable, great for illustration and comics, user-friendly | Limited 3D capabilities | 2D illustration, comic art, animation |
| Blender | Free and open-source, powerful 3D modeling tools, versatile | Steep learning curve, can be resource-intensive | 3D modeling, sculpting, animation, rendering |
| ZBrush | Industry standard for digital sculpting, highly detailed models, organic shapes | Expensive, steep learning curve, specialized for sculpting | 3D sculpting, character design, creature design |
Alright, here’s the updated blog post content with the conclusion, helpful tips, and a summary of key points:
Wrapping Up
Designing compelling characters is a journey, not a destination. It’s about constantly learning, experimenting, and pushing your creative boundaries. Embrace the challenges, celebrate the victories, and never stop seeking inspiration.
Remember that even the most seasoned artists were once beginners, so keep honing your skills, building your network, and sharing your unique vision with the world.
Cool Facts You Should Know
1. A strong understanding of anatomy is crucial for creating believable character designs, even if they’re stylized or fantastical. 2.
Studying the works of master artists and designers can provide valuable insights into composition, color theory, and storytelling. 3. Experimenting with different art styles and techniques can help you develop your own unique artistic voice.
4. Don’t be afraid to break the rules and challenge conventional design principles to create truly original characters. 5.
Networking with other artists and industry professionals can open doors to new opportunities and collaborations.
Key Takeaways
* Teamwork Makes the Dream Work: Clearly define roles and establish a unified visual direction to ensure a smooth and collaborative design process. * Inspiration is Everywhere: Actively seek out diverse sources of reference to fuel your creativity and ground your characters in reality.
* Feedback is Fuel: Embrace iteration and seek feedback early and often to identify areas for improvement. * AI Augments, It Doesn’t Replace: Leverage AI tools to explore new possibilities and break through creative blocks, but always maintain artistic ownership.
* Workflow is Key: Optimize your workflow with the right tools, techniques, and time management strategies to bring your characters to life efficiently.
* Show Your Work: Build a strong online presence and showcase your work to the world through a compelling portfolio and effective social media presence.
Frequently Asked Questions (FAQ) 📖
Q: How do you even start when the team has totally different ideas for the character’s vibe?
A: Oh man, been there! What I found really works is a good old-fashioned brainstorming session, but with a twist. Instead of just throwing out ideas, try using a mood board.
Get everyone to contribute images, colors, and even music that represents their vision for the character. Then, as a team, identify common threads and build from there.
It’s like you’re visually averaging everyone’s ideas. Also, don’t be afraid to use AI tools like Midjourney or DALL-E to generate initial concepts based on your mood board keywords.
Seeing those visual interpretations can spark even more collaborative ideas and help everyone get on the same page (literally!).
Q: How can you ensure the character design is unique and doesn’t just look like a rip-off of something else?
A: This is a tricky one, and I’ve definitely had those “Wait a minute, doesn’t that look like…” moments. The key is research, but smart research. Don’t just Google “cool character designs.” Instead, dive deep into obscure folklore, historical figures, or even interesting animal adaptations.
Draw inspiration from unexpected places. Also, really focus on the character’s backstory and personality. The more fleshed out their internal world is, the more unique their visual representation will become.
I remember designing a character based on a lesser-known Celtic deity, and the research into their symbolism and mythology gave me a ton of unique design elements I wouldn’t have found otherwise.
Plus, keep an eye on trending styles, but put your own spin on them. If everyone’s doing cel-shading, maybe try a more painterly, textured approach to stand out.
Q: What’s the best way to manage feedback and revisions without it turning into a design-by-committee nightmare?
A: Ah, the feedback gauntlet! This is where clear communication and process are essential. First, designate one person as the “design lead” who has the final say (after considering feedback, of course).
Second, establish clear feedback parameters. Don’t just ask “What do you think?” Instead, ask specific questions like, “Does the character’s color palette effectively communicate their personality?” or “Does this silhouette read clearly?” This helps focus the feedback and prevents vague, unhelpful comments.
I also found it helpful to schedule regular feedback sessions with a defined agenda. This keeps things organized and prevents feedback from trickling in randomly.
Finally, document everything – feedback, revisions, and the reasoning behind them. This provides a clear record of the design process and helps avoid unnecessary back-and-forth.
Trust me, it saves a lot of headaches down the line!
📚 References
Wikipedia Encyclopedia